Showing posts with label bunting. Show all posts

Thursday, November 15, 2012

French Wedding, Zazzle and GIMP

Zazzle makes it pretty easy to coordinate your wedding (or anniversary, reception or other event) with all the stationery products you need, with customized cards you design yourself or a huge variety of interesting designs from other designers. I am going to use a few products that I recently designed as an example.

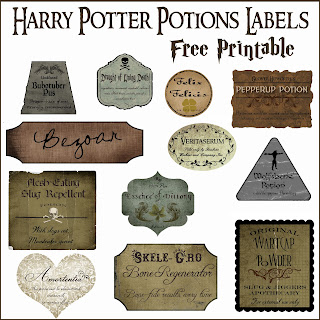
I have been kind of interested and charmed lately by the vintage bunting/garlands that have been popping up in many places lately. Some might recall the Halloween bunting I made for our home decor and my daughter's birthday party last month.

SPOOKY Bunting


I used GIMP, my free image manipulation program, to make French ephemera wedding bunting to apply to various products in Zazzle. The background for the letters to spell out OUR WEDDING is   made of lovely vintage French typography, advertisements, receipts, etc. - all from Karen at the Graphics Fairy. It took a bit of time to shape each piece of ephemera into the pennant, or equilateral triangle, shape before applying the letter to each one. I used a great font called Chocolate Box Decorative.

I then applied a background and text and came up with invitations, Save the Date postcards and RSVP cards.


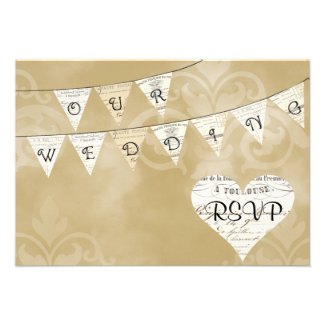
Table seating cards and menu cards are also possibilities.

I have the French Wedding bunting with alternative backgrounds that I have not yet posted on Zazzle. These are more colorful designs with swirls and leaves in the background in either aqua/teal or purple/lilac/tan.

Now, I have to admit that I had the individual pieces of the wedding bunting done right after I made the Halloween banner, but I could not for the life of me draw a satisfactorily smooth line as the "string" the bunting pieces were attached to. I tried again and again. Guess my hand is just not that steady.

So, in the interim, I have been watching quite a few GIMP tutorials on YouTube, and been reading a lot of GIMP advice. When I found this written tutorial about how to draw a circle, and other shapes in GIMP, I knew it was just what I needed for this bunting project. 

Basically, you use your select tool, in this case the circle (or oval) select. Position your selection where you want your line to be; it doesn't matter if part goes off your image (mine had to a lot to get the correct curve) or if there is extra where you don't want a line, you can just erase later. When you have your selection positioned, go to Edit-Stroke selection, then make your line as thick as you want it (I believe mine were 3 pixels). This also works for squares and rectangles with the rectangle select tools and for other shapes with straight lines. This was a great discovery for me.

I made this funky, fun design


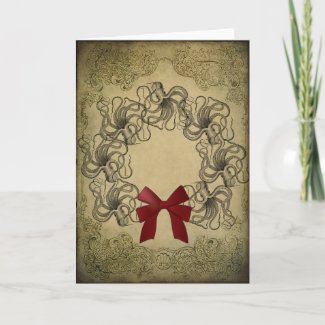
...by drawing a circle the same way on a transparent layer as a guideline for laying out the wreath, then just making it invisible (or deleting it) later.

I know this GIMP "discovery" is probably very elementary for most GIMP users, but I am still reading, watching and learning (mostly through trial and error) and it was just what I needed.

Tuesday, October 16, 2012

Halloween Party Ideas

I know it has been about 100 years since I wrote a blog post.

My garden is still plugging along and getting a bit refreshed in the Texas 2nd growing season...I have lots of little red peppers, arugula and a couple of little Fairy Tale eggplant, plus so many happy herbs.

Also, I have continued with my art and craft projects, especially creating and posting lots of stuff to my Zazzle store. I am totally unprepared, but a lot of people seem to be getting ready for Christmas already, and are buying their cards and ornaments, especially popular have been the international Santas, like the Paris, Rome and London cards and ornaments.

But here lately, I have to admit, I have been a bit preoccupied by Halloween. You see, my daughter, who has a mid-October birthday, has decided that she wants to have a Halloween costume birthday party at home. ! What, you mean I have to clean and organize my house?? Actually, I love the idea, and we have been brain-storming lots of cool decorations, foods and spooky activities.

Today, I made this "SPOOKY" Halloween banner, using scrapbooking paper, card stock, a scalloped paper punch, a great font, Elementary Gothic Bookhand, and small black fabric ribbon. Here it is hanging from our antique (past its prime) piano.

I had wanted to make another banner that I found as a free printable on line. I think this person did such a good job in designing this banner, but I just couldn't get it to print right, after selecting landscape a few times, and other options that should make that work with my printer...even tried it with another computer. Alas.

I do have about 2/3s of it printed out  and cut out, so I will ask my computer expert to help me with this.

I spent a ridiculous amount of time today soaking, scraping and scrubbing labels off of various "potion" and "poison" bottles for beverages. Here are some cool sites and resources for printable Halloween bottle labels. The 1st is one of 2 I found at the Graphics Fairy site.


These are going to be awesome beverage labels for my daughter's party.

Also, I found out the most awesome thing online...but unfortunately, I do not remember what site it was on. If you add a little tonic water to a beverage, then it will glow in a black light. (I'm really excited about this one!)

Well, that is what is going on with us this season. Maybe, I'll post party pictures later. And after that is all over, maybe I will even get around to painting again.